How to Make a Music Visualizer Video with SongRender
 Jake Lazaroff
You just finished your best song yet, but after uploading it to SoundCloud and tweeting out the link a bunch it only has a few plays. What gives?! You know this shit is hot!
Social media is a crowded place, and it can be hard to stand out. One thing you could try is making a music visualizer video. You’ve probably seen them on YouTube or Instagram: a music video with a cool background, where a graphic moves in time with the song. It’s called “music visualization” because the graphic actually depicts things happening in the music, like a melody or a drum hit. In this blog post, we’ll learn how to make a music visualizer video with SongRender.
First, head over to app.songrender.com and create an account. Once you’ve done that, click “Create project”.
The first thing to do is upload your song. You should see a window containing a box with a dashed outline. Either drag an .mp3 or .wav file from your computer into that box, or click the box and pick one from the dialog that comes up. After that, click “Choose file”.
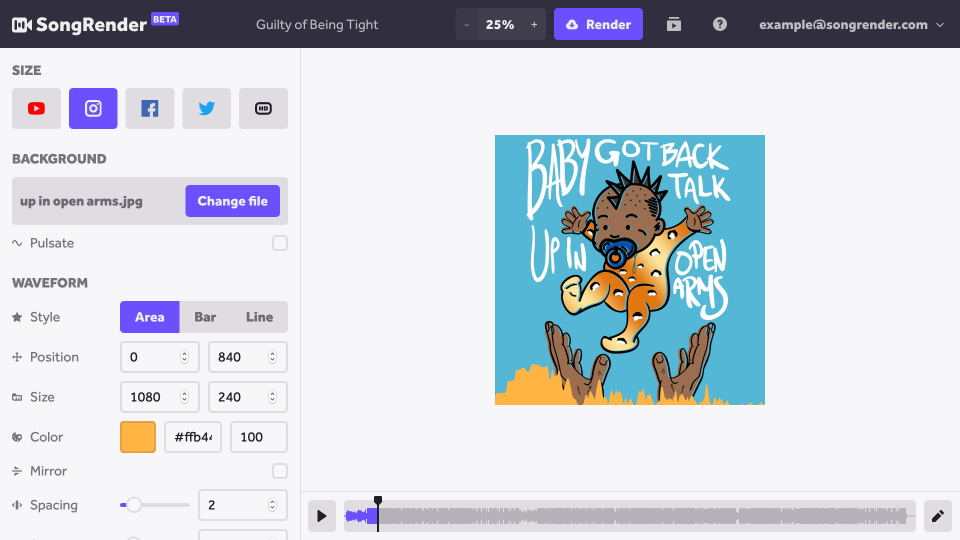
At the bottom of the screen is the timeline. It lets you play through or go to any point in your song. If your waveform isn’t showing up, try clicking around the timeline — your song probably doesn’t have any sound at the very beginning.
Before we go further, let’s figure out where we’re going to be posting this video. The vertical bar on the lefthand side of the screen is called the layers panel. At the top of the layers panel, there are buttons for a bunch of social networks. Clicking on one will resize the video to the right format for that social network.
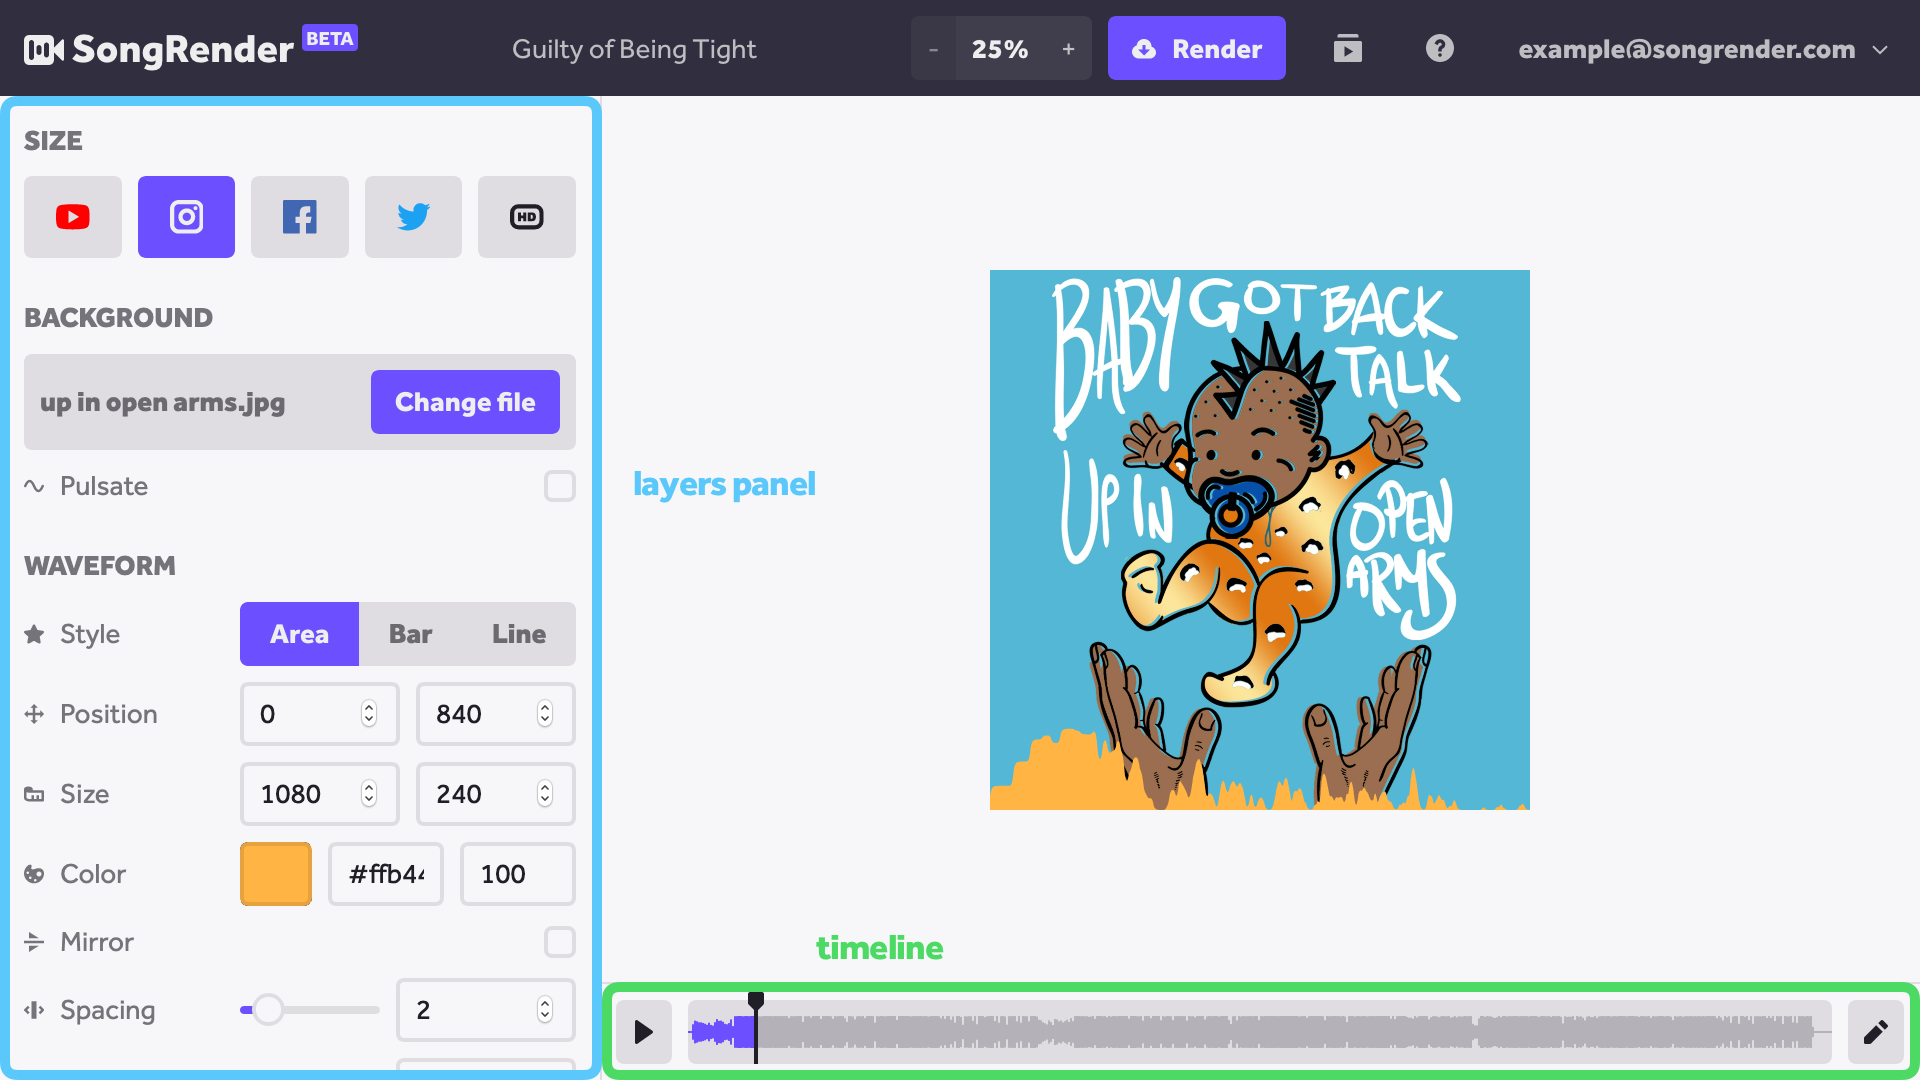
The next step is to upload a background. In the layers panel, there’s a section there labeled “background” with a big button that says “Choose file”. When you click that, you’ll get another window where you can upload an image from your computer or add it from Dropbox.
Next, we’re going to customize the music visualizer. First, click and drag on the waveform to move it. where you want. If it’s not the right size, you can drag the handles in the corner to resize it. You can also play the song to see how it’ll look when it’s animated.
In the layers panel, there’s another section labeled “waveform”. There are three main styles of waveform: bar, line and area. Try them out and see which one you like best! You can also uncheck the box that says “mirror” to make the waveform flat at the bottom.
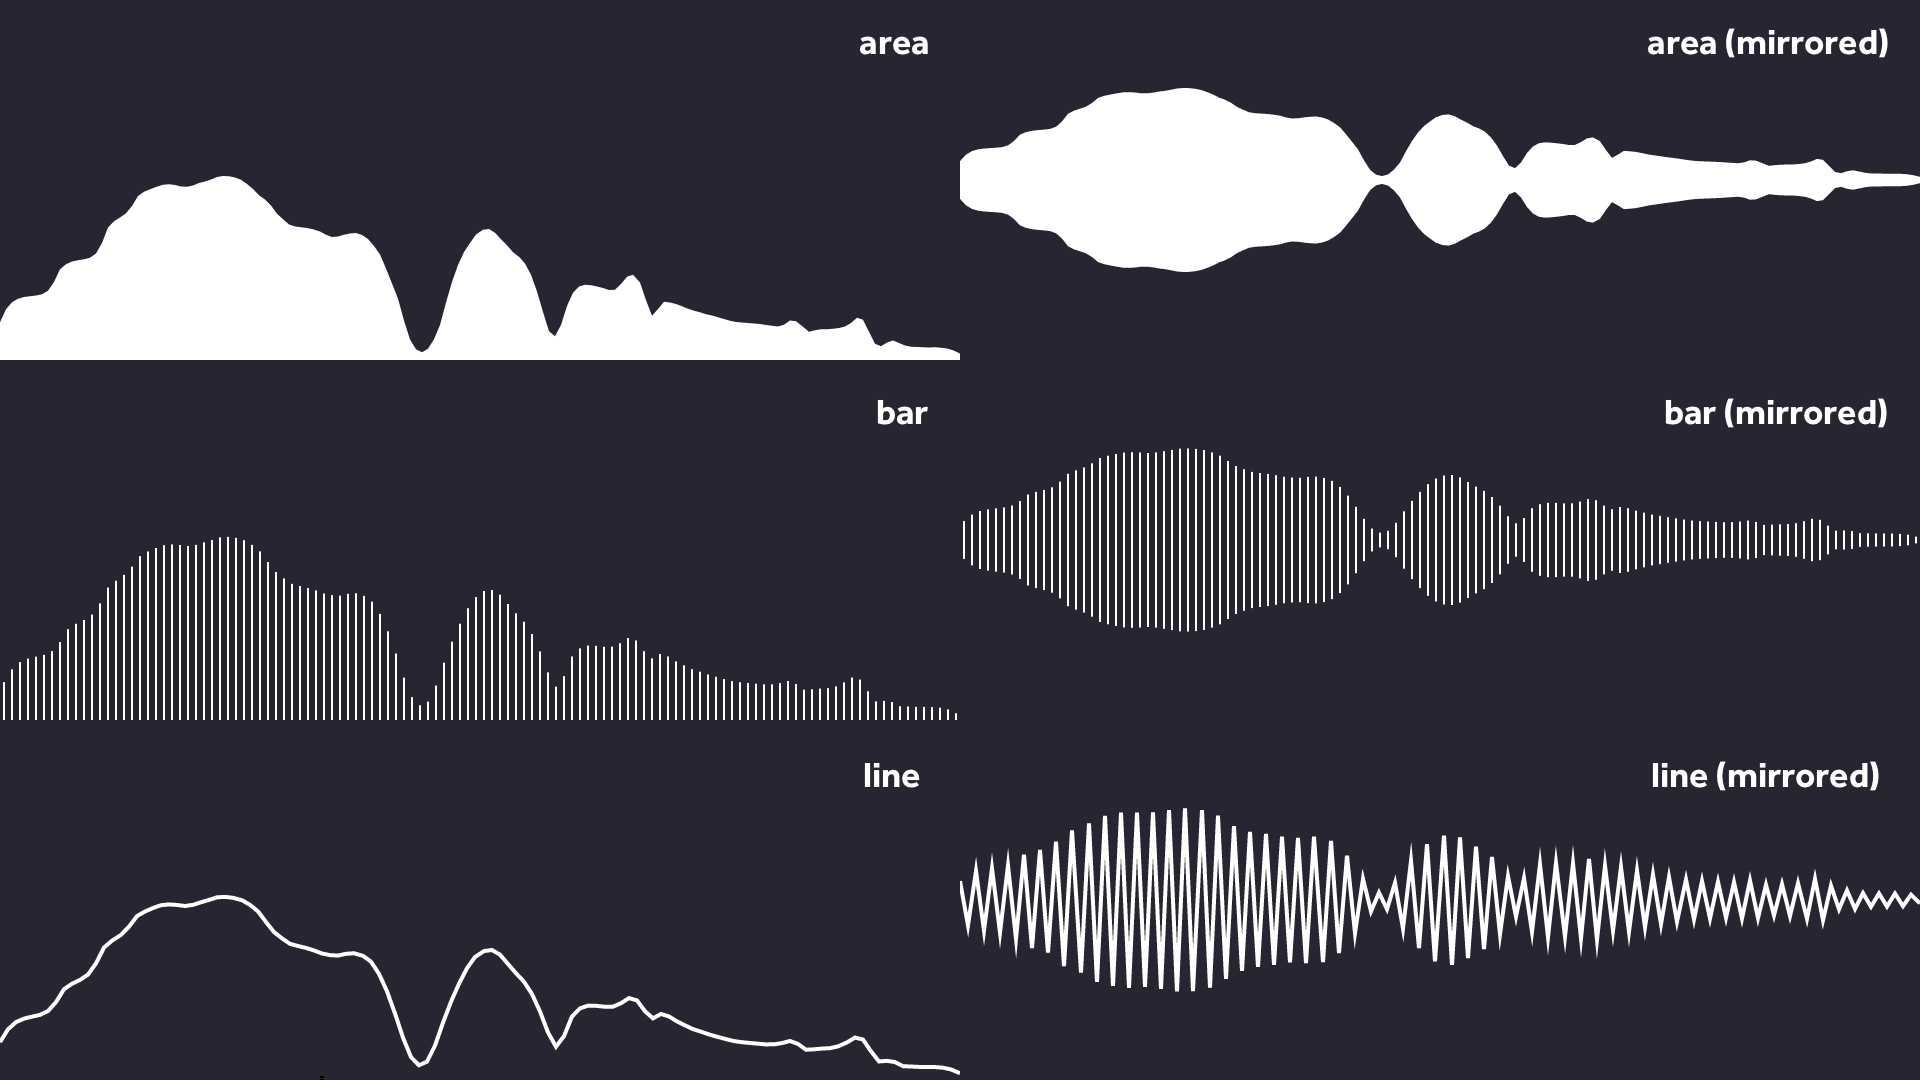
Clicking on the color swatch brings up a color picker. You can also paste in a hex code if you know the exact color you want. “Thickness” is how thick the bars or line are (this setting doesn’t exist for the area style). “Spacing” controls how many different peaks the waveform will have; for the bar style it’s just the number of bars, whereas for line and area styles it’s a bit more subtle.
The next couple settings are a bit more advanced. You can leave them alone if you want to, but we’ll go through them for posterity. “Smooth” will make the waveform look less blocky, but if you put it too high it’ll lose its definition; I recommend setting it to 0-2. “High cut” is just a high cut filter; it’s the maximum frequency the music visualizer will use. Putting it up to the maximum of 20,000 ends up leaving a lot of space on the right of the waveform. I’d recommend setting it to somewhere between 2,000 and 8,000.
Finally, all that’s left is to render the video! Give it one last play through to make sure you’re happy with it. Then, in the toolbar at the top there’s a purple “Render” button that opens a window with the video size and price. Removing the SongRender watermark costs $5, but if you don’t want to pay you can always uncheck “remove watermark” and render a video for free. When you’re ready, click “Render”.
Now the SongRender robots are rendering your video. It usually takes a bit, so get up and stretch. You can check the status in the videos menu in the toolbar. When your video is ready, you’ll see a button labeled “Download” there. Click it and your video will download.
Voila! You just made a music visualizer video. Now share it and get your music seen!